 This has been a post that has been on my mind for far too long. About cost resources is a About post that focuses on a very specific resource type you can utilize in Microsoft Project. I’m using MS Project Pro for Office 365 and Project Online. But most of the things you see here will also be appropriate for Project (Server) 2010, 2013 and 2016.
Let’s start with some information about these cost resources, as provided by Microsoft itself:
A cost resource lets you apply a cost to a task by assigning a cost item (like a capital expenditure on equipment, or variable costs such as airfare or lodging) to that task. Unlike fixed costs, you can apply any number of cost resources to a task. Cost resources give you more control when you apply various types of costs to tasks.
That’s very useful, with this resource we can set multiple cost types on a single task and follow how the project expenses grow. But how will we go about achieving this? Let’s have a closer look at: Creating cost resources, setting actuals for cost resources, budget cost resources, how to report on Cost resources and finally if there are specifics to keep in mind when you are working on Project Server (or Project Online).
How to create Cost resources
A cost resource might represent an expense that you have during the life cycle of the project(s) that has a variation in rate each time it is used. Two good examples are Hotels and Flights. As every hotel/flight has it’s own price but you want to gather all Hotel expenses during the project without using multiple resources or a “fixed cost” value that is hard to track.
Creating a cost resource is done in the Resource Sheet in MS Project. The column to take a close look at is Type. It has 3 options: Work, Material and Cost.
As you select Cost as type most other columns from the Resource Sheet are inactivated. Material label, Max units, Standard (std.) Rate, Overtime (Ovt.) Rate, Cost/Use and Base Calendar have no value in the Cost resource situation. This is because the Cost resource will be a placeholder of the costs of a certain type, and won’t have a calendar related to it for example.
Only Resource name, Type, Initials, Group, Accrue at and Code are still editable. I would argue to keep Resource name and initials the same, but that’s just a personal preference, it makes views easier when you don’t want to have the full names in the bar styles but want to work with initials.
For example I created 2 tasks with myself and a hotel booking on one task. Where one bar looks at the Initials rather than the Resource name:
Code might be interesting if you are working with project server and have costs linked to a financial application, but I haven’t ever used it myself in combination with the cost resources.
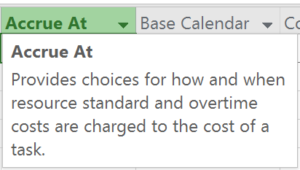 Accrue at might be interesting to take a look at. The description states that resource standard and overtime costs are effected by the choices that you set in the Accrue at column. And since the cost resource has neither this column shouldn’t effect the cost resource. Let’s have a closer look at this situation when we report actuals on the tasks that have cost resources assigned to them.
Oh, and assigning a cost resource can be done by the split screen, but I would advice using the Task information dialogue box. This will give you the option to set the costs associated to that assignment (fun fact: the value is shown in the GANTT chart as well!).
Setting actuals for cost resources
The “only cost resources” situation
When you have a task specifically dedicated to costs and the cost resources MS Project will calculate the actual costs like you expect. A task with a 1.000 euro Hotel costs associated with it will show 500 euros spend when you set it to 50% complete:
Let’s see how Microsoft Project reacts to the same situation if we set the Accrue at column to another setting… wait… what?! Huh?!
Two things will happen when you set the Accrue at to “Start”. First thing that you will notice is that the Actual Cost is set to 1.000 euro’s. But then you take another look at the % complete value that you just set to 50%… but it didn’t stick! IT IS STILL 0%.
Now let’s see what happens when I set the Accrue at to “end”:
Things get stranger still. I’ve included the earlier task that had actuals on it because the costs were accrued at the start of the task to show that’s happening.
As soon as I set the costs to accrue at the end of the tasks all actuals that were made on tasks that weren’t reported 100% complete were immediately neglected and reset to zero. And the other thing is, MS Project will not react on the second task until I set it to 100% complete before it will ad the actual costs (which is what I wanted to accomplish).
I don’t quite like the situation where I enter a value and it doesn’t stick, or when I change the value of a column and actuals are neglected. But there is a argument for this situation. If all costs are made at the beginning of a task, and the task only holds a cost resource, then the task should be either completely done when the costs are made or not at all. Only the values 0% or 100% will make sense. A task wouldn’t have a 2 weeks duration if all costs are made directly at the start of it right?
Let’s see what happens when we add 2 cost resources to a single task and set them to 50% done. I’ll use Hotel and Travel costs, in the first screenshot I’ll have them Prorated both with 1.000 costs on the task. In the second example I’ll have Hotel costs accrue at the end, and Travel costs accrue at the start.
Both prorated:
And now for Travel at start and hotel at end:
The things to notice: here the % complete still makes no sense if you have a accrue at situation different from the Prorate standard setting. But it looks nice for the rest because the travel has been payed up front, and the hotel booking will be payed on check out.
The “mixed resources” situation
I won’t go into this section in much detail as there are already (at least) two excellent sources out there describing the situation: Ben Howard and Nenad Trajkovski covered “the bug” in detail.
Suffice to say a MS Project schedule won’t work (very well) with Work resources and Cost resources on a single task. Without some extra work, described in Nenad’s post, a task that is set to 100% complete won’t show the costs for the cost resource as actuals. Here are 3 screenshots describing the situation. All with 50% complete and Erik, with his hourly rate, as resource together with the Hotel cost resource for 1.000 euros:
Prorated cost resource situation:
Hotel accrue at start, Erik still prorated:
Hotel accrue at end, Erik still prorated:
Hmmm, As described by both Ben and Nenad in their excellent posts, the issue is still here in regards to progress on tasks with both a cost and a work resource. Nenad has a workaround in his post, but that just sounds like to much hassle if you ask me.
Using cost resources on milestones
Because of the situation described above, I would argue to use milestones and assigning only the cost resources on them to represent the costs that were made at that point in time. Mostly you would have a specific cost at a specific moment in time, instead of the situation with a work resource where costs will be on an hourly rate.
This is the only time I would allow resources on milestones!
About Budget cost resources
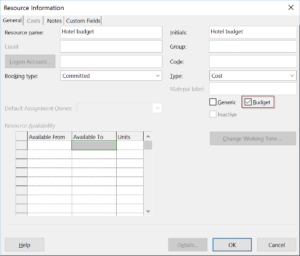
Budget resources are the only resources that can be assigned to the Project summary task. The Budget resource can be either a work or a cost resource. Where a work budget resource would be interesting if you are allowed to only use 10.000 hours of Electrical engineers. The same goes for Cost budget resources. Where you would set a max travel expense of 15.000 euro’s for the whole project.
Setting a budget cost value can only be done from a task usage or resource usage view and adding the “Budget cost” value:
You will use these budget resources in combination with the actual cost resources to get a clear overview on how your project is doing.
Reporting on Cost resources
For this section I’ve created a project that holds all cost type resources I could find. Including: cost resources, work resources with hourly rates, material resources and two types of budget resources (Work and Costs).
This schedule also has a baseline and actuals. In other words, all the ingredients for a nice report. Let’s see what Microsoft has to offer out of the box.
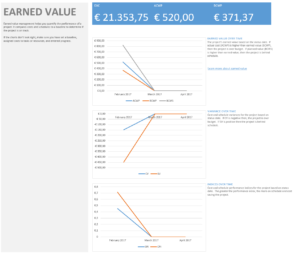
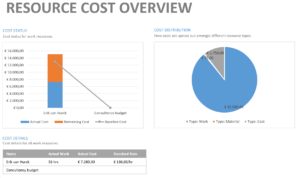
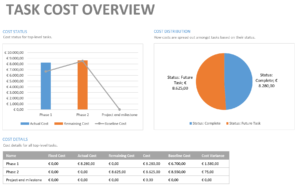
In the Project Tab Report, there is a section called Costs. Which hold the following reports based on the above schedule:
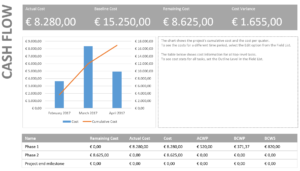
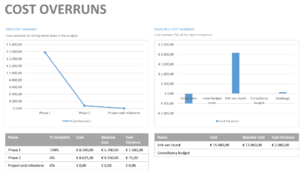
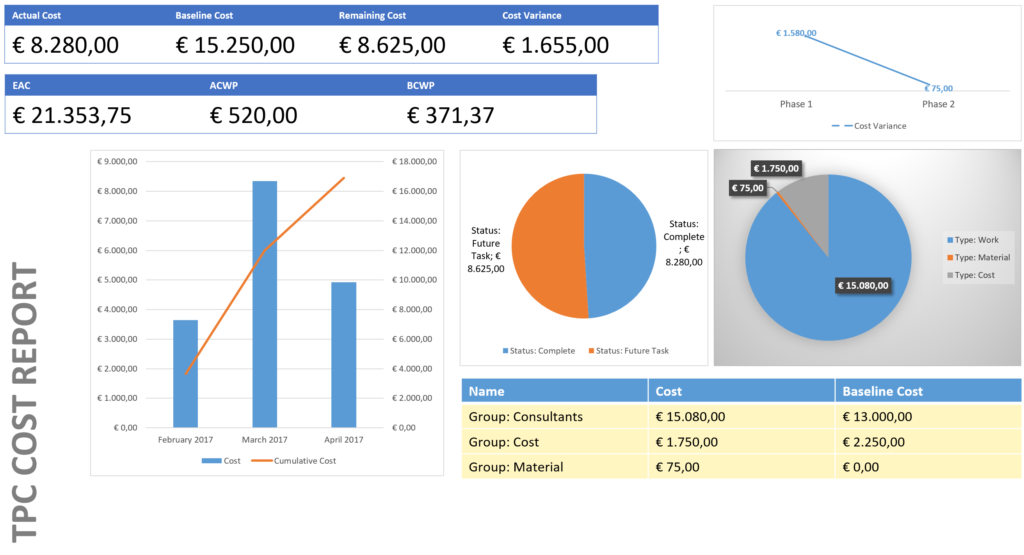
Now all of these have a nice overview (especially the overview reports) of the total costs and all that information. But I thought I’d create my own, reusing some of the visuals from above:
It holds most of the important values as well as EVM, time phased and accumulated data and, most noticeable: The cost resources group!
Bonus content: You can download the report, example schedule and how to get the report for your own schedule as a free bonus content when you sign up for the TPC Newsletter.
Using cost resources with Project Online / Project Server
There really isn’t much to talk about when it comes to the cost resources in regards to Project Online or Project Server. As the same information as described above still holds true. But there are 3 things I would like to mention here:
Power BI: A overview of the complete portfolio of projects within your organization is done by utilizing Power BI, or other reporting tools. By gather costs from Project Online/Server and a financial system (such as SAP) and comparing them in a nice Dashboard. This is a sure benefit compared to the stand alone MS Project schedule.
Unification: With the Enterprise resource pool, you are ensured that every planner uses the same types of resources. Giving you (for example) a nice overview of all the hotel costs for all projects in the current year.
Third party applications: Partners such as Projectum and UMT360 created great additions/apps for the “sometimes not so easy to use” cost structures of MS Project. Projectum has recently sold their app to Microsoft and it will be incorporated in the Project Online offering in the near future.
Costs on other resources
You might already know about the other types of costs that are available in Microsoft Project. In the link I shared at the beginning Microsoft shares all you really need to know. Here’s the distilled version:
- There are Fixed costs (not related to a resource)
- There are Standard rates, Overtime rates (calculated per hour and associated to Work resources)
- There is Cost per use (a 1 time cost per assignment. Related to Material and Work resources)
- Oh, and Standard rates is also used for Material resources, as a Per pice price.
Final notes
Woohoo, that’s it! You made it all the way through another epic about post. Congratulations, and thank you for reading the article.
As mentioned earlier in the post, when you sign up to the newsletter, you get access to the TPC Followers OneDrive. A specific section of the OneDrive I created to share valuable content with you, my readers. Read about what’s available for everyone in this earlier post I did.
If you wanted to read more might I suggest, picking up a book? Or maybe one of the other posts I’ve written regarding my 3 favorite reports or the office templates.
With the kindest regards, and thanks again for reading,
Erik van Hurck




That’s awesome, Erik. What a great post!
Thanks Raphael! It took some work to get it together but I’m happy with the result :).
Very well done Erik! I will put this information to use. I’m still kind of a newbie to MSP but I think I understand. I do have a question. I have a project set up with about 500 tasks, most of which with hours and labor resources, some material resources as well. I used project to sum my costs. I have baselined my project and have it approved. I want to use what I’ve done to track Estimated vs Actual. However, I do not want to have to enter hours at a granular level like the tasks break down. I just want to be able mark a task complete when it is done. Is there a way that I can enter monthly actual costs so that my summary rows can show me remaining funds against my original plan? Thanks in advance for any tips you can give me. Much appreciated. Joe
Hi Joe,
Thanks for the complement. And welcome to MSP. Have you seen my other posts about the Flaws of incorrect use? That might be a series of posts that will interest you as a beginner: http://bit.ly/TPC_IncorrectProj
In regards to your question. There is no way you will be able to add actuals to summary rows so you will still need to add them on a task or resource level. The most useful views for this, in my opinion, are Resource usage and Task usage. Both views can be (time)scaled to a month and can include “actual work” and/or “actual costs”. To include those lines: Right click on the “Work” bar in the middle of the screen and select the row you want to add.
Hope this helps and the best of luck with MS Project. And just let me know if I can help you out,
Erik van Hurck