
Hi reader, welcome to part two of this new series on TPC. In the previous article I started with a short explanation on why I’m doing this set of articles on PowerApps. In that article I spoke briefly about the two different kinds of apps you can create: Model driven and Canvas apps.
In this article I’m diving in deeper and exporting the two options in more detail. In which instances would you choose a Canvas app over Model driven, and the other way around. Moreover, I’m keeping in mind that we are specifically interested in Project Management solutions.
Canvas, what is it?
I would like to call canvas apps a “Single purpose app solution”. And you can read more about what Microsoft says in their article “What are canvas apps?“.
Now, why do I call them a single purpose app solution? That’s because they are created very fast, work on any device and you are able to customize nearly everything in them. BUT with limited calculation and storage possibilities.
When you log on to PowerApps.com there’s a great section with some nice templates right from the homepage:
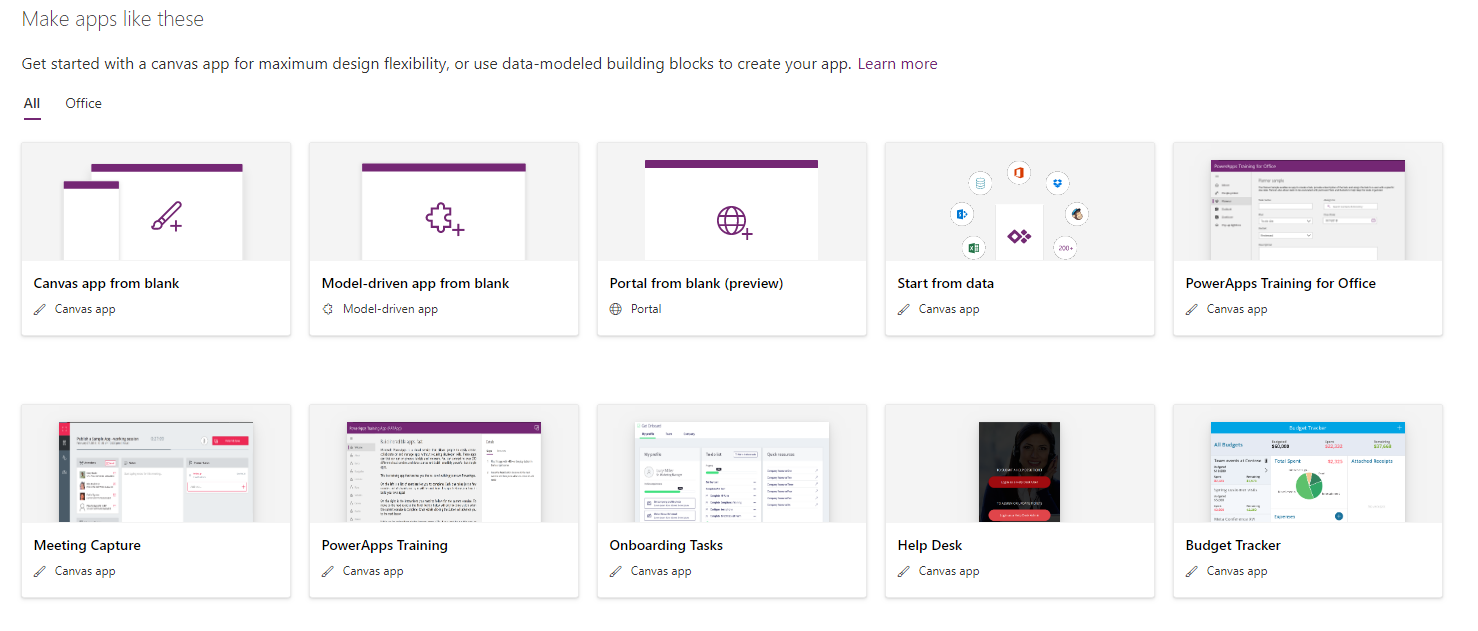
There’s also another hint at what Canvas and Model driven apps do/are.
[…] a canvas app for maximum design flexibility, or use data-modeled building blocks to create your app.
Let’s create a canvas app

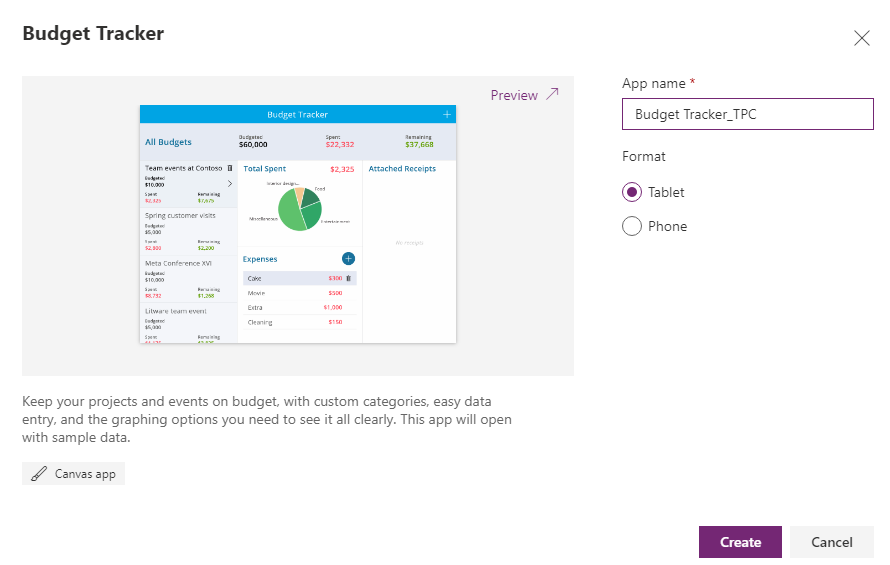
I will pick the “Budget tracker” canvas template and we’ll see where that takes us.
You can find the Budget tracker with all the other templates as soon as you click on the create icon on the left. When clicking the icon you get the following menu:
And within just a few seconds there’s a new page presented that contains our Budget app.
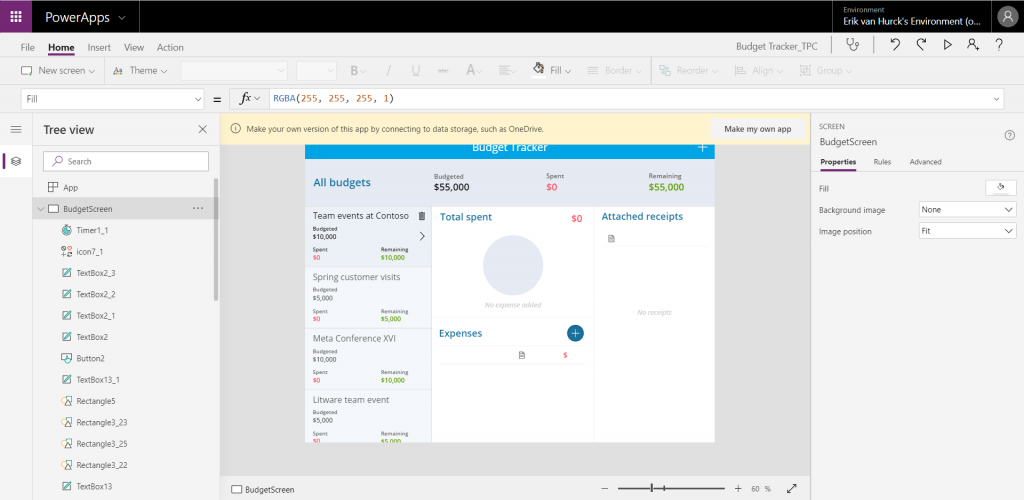
And the big yellow bar tells us we can create our own version of the App, YES!
I love the new Microsoft, you know: the one that accepts third parties on their platform. Here’s a great example of just that, when clicking on the “make my own App” I am presented with a data storage location, and it’s not all Microsoft products.
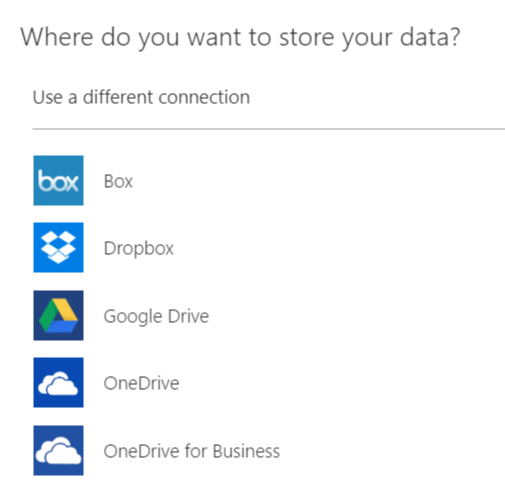
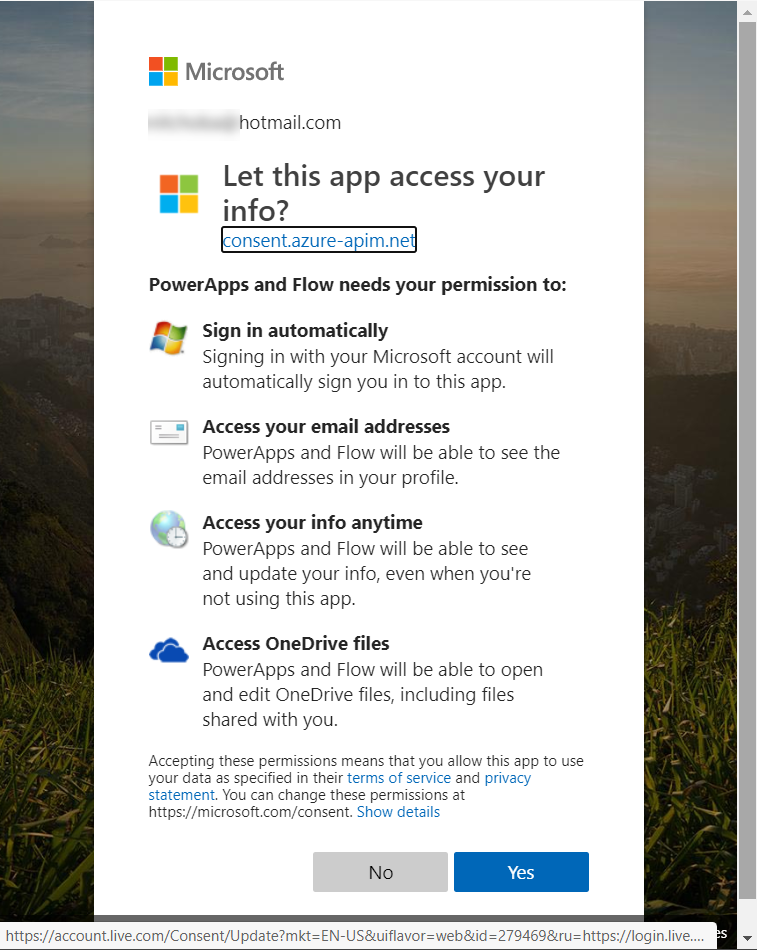
I’ll choose the OneDrive option for now and connect with my personal Hotmail account (yeah I’m that old haha). When you log in to the account there’s a permission window that might be good to take notice off. The app want’s a lot of access that I wonder if it really needs it all. But for the sake of this blog I’ll accept for now:
After this there’ll be a save option that automatically saves to the cloud, but there’s also an option to save a local version if required.
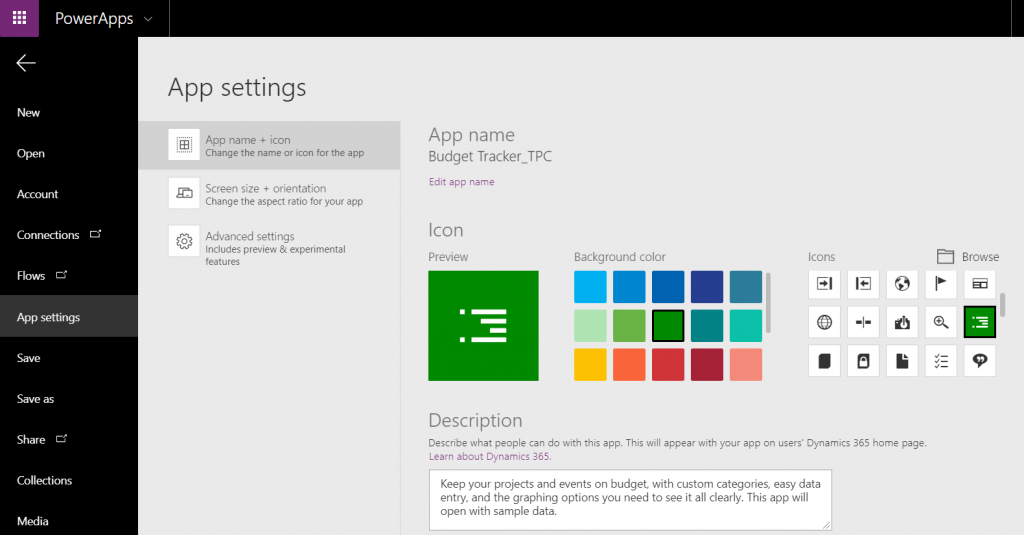
And from here I could enter the App settings and make some cosmetic changes such as the color (Project Green, you know me :-)) and a icon that looks like a Gantt chart.
The App itself contains different screens. And each screen has elements that you can manipulate further. The screens all have their specific purpose: Budget, NewBudget, AddExpense, Receipt, Delete Receipt, DeleteExpence, DeleteBudget.
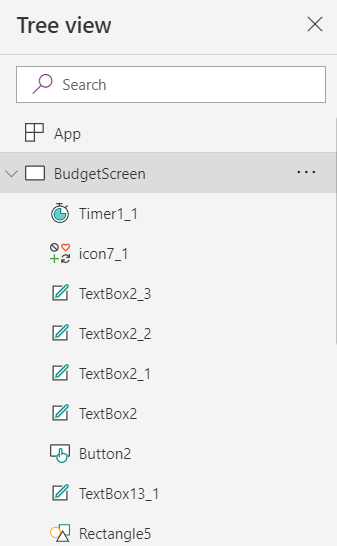
A left section on PowerApps, called the tree view” gives you a nice overview of what all screens contain. Some better descriptive texts would have been useful though:
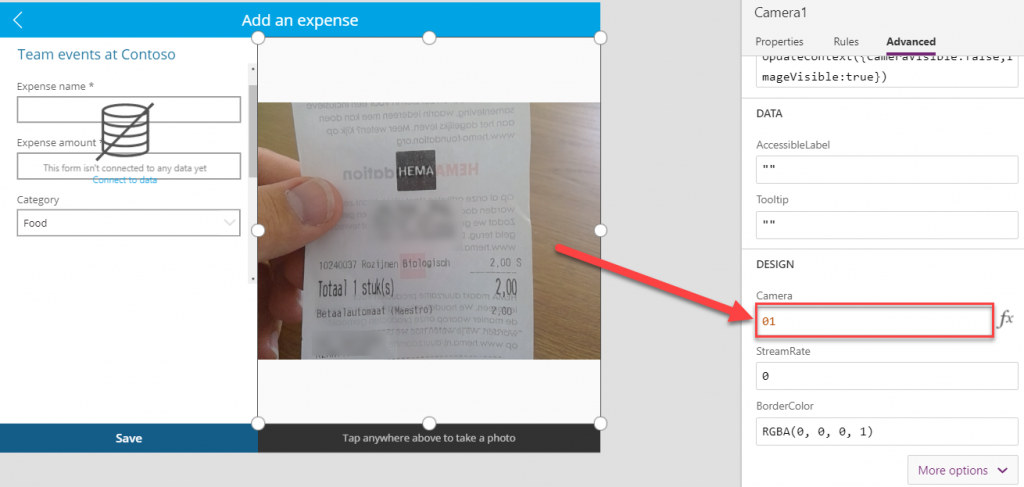
With out going in to much detail right now (I’ll come back to it in later posts), the most interesting page to me is AddExpenseScreen. You have a screen that contains a camera connector. And by changing just 1 parameter in the camera screen I was able to switch between the front camera and the back camera.
Let’s revisit the Budget App in later posts. And let’s get back to the topic of this post. So there are two app types, Canvas and Model Driven.
Model Driven, what is it?
Right from the start we should say that model driven has the purpose in the name. This kind of app focusses on working with a model.
So, in order to use this app successfully we would need structured (organizational) data. A simple example could be the following hirarchical data tables:
- Programs
- Projects
- Tasks
Each of these could be linked to each other to create a model that we would like to consume in a Model Driven App. Lets do just that:
Programs, projects and tasks entities
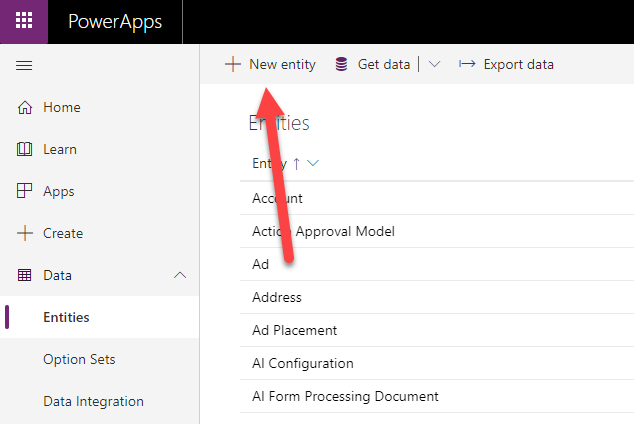
To create the tables I go to PowerApps.com again. And I’ll navigate to the CDS data by clicking on Entities. And click on New entity:
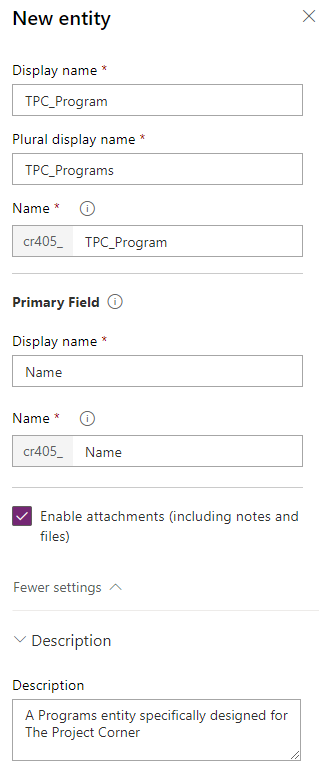
For now I’ll include a new entity called TPC_Program, and the plural display name is automatically created as TPC_Programs (great feature).
The database name is prefixed (auto created and read only) with a number “cr405_” in this case, making it easy to find and reuse.
A primary field is a user field that they will see when “adding of creating or searching a program. More information in the i:
The primary field is the main user-friendly text identifier for your record (oftentimes a name or a number). The value in this field will be shown to users when they need to select from a list of records.
Further down I add the option to add Attachments (never know when I’ll need those) and I gave it a nice description.
I got a warning message when creating the entity, telling me I cannot undo the attachments option above. But I’m oke with that for now.
And with that I have now created a “empty husk” for the Programs:

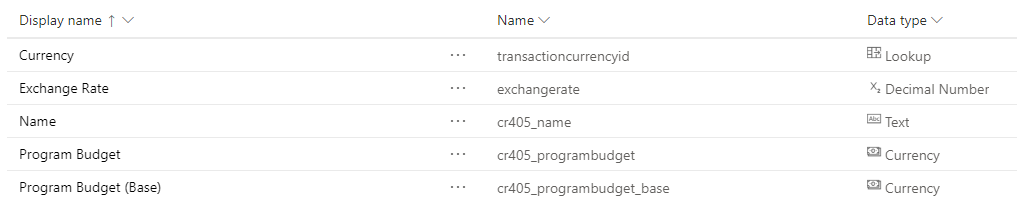
I’ll add a couple of more fields, Program budget, Program owner and description would make sense.
When creating the budget field I had the option to include role up. Interestingly enough, I created the field as a currency field and it created multiple custom fields straight away:
After this I’ll save the entity and move on to the next.
To speed things up I’ll use a method described in Peter Kestenholz’ video about importing Project Online data. I’ll do this for Projects and for Tasks, and I’ll only import a couple of values for now. One thing I would like to say; the data integration section that includes Power Query is SO NICE to work with. Love it when different applications mix so well.
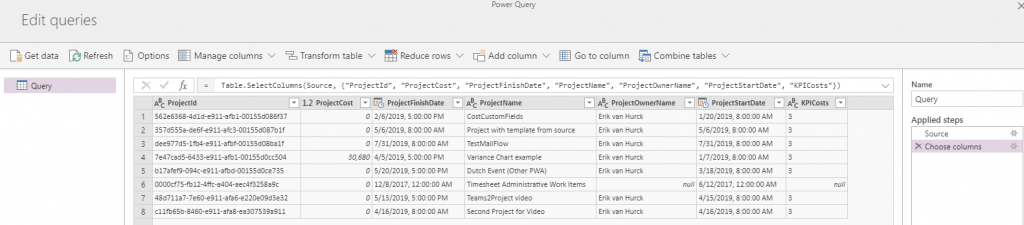
And after some struggles with importing the data I get the 3 entities I need. Next up:
Creating a blank Model Driven app
Now this is completely different from the Canvas app, after you provide an app name and image you get the following screen:
Let’s see what happens when we add the 3 entities by clicking on the right section. After adding this data 3 new rows show up underneath the entities section. But there’s no way to see what we have before we have a site map. So let’s try that out:
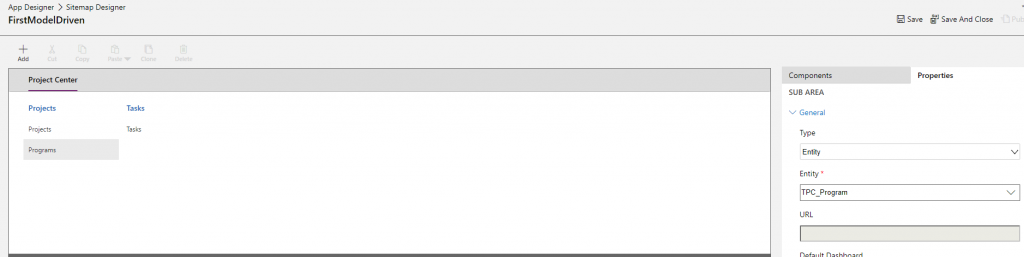
After saving the Site map I have the option to validate, and I get 3 warnings. But let’s revisit on a next blog. I’ll publish and see what we created.

Clicking on Publish and playing the app results in the following screen:
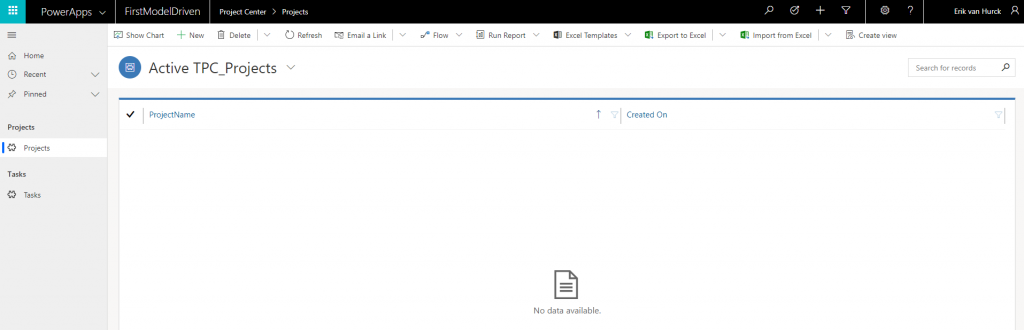
I can add tasks, and projects, but there’s still a lot missing. Simple things like relations are still missing, logical forms and views are lacking as well. But like I said previously, let’s revisit the model driven app in later posts and select specific sections/items in more detail and build it out to something that’s useful and pretty.
Final notes
Concluding on the post I would like to state that the canvas app looks a lot easier to create and build compared to a model driven app. But that can also be because I used a template for the canvas and started from scratch in the model driven world.
I wanted to thank everyone that is blogging on the topics for Canvas and Model driven, without them we would all probably be lost in translation on these tools. I hope that, during the course of this series, I will become one of the people that help you in creating your own awesome apps as well.
Stay connected, and subscribe to the newsletter to not miss a thing.